Fine antique furniture, should always be correctly maintained and restored by experts. However if you have ever been to a flea market, antique fair, charity shops or car boot sale, you have probably stumbled across the odd charming pieces, that whilst beyond traditional restoration or not truly antique, still have oodles of charm. Such pieces are just perfect for a creative project.
Up cycled furniture & household objects can also blend stylishly with certain styles of antique furniture, bringing a modern eclectic interior design feel to your home. You also can save the pennies with your thrifty up cycling efforts, leaving more budget for those really special antique purchases.
Up-cycling is the process of taking objects that might otherwise be thrown away, and giving them a creative new lease of life. It is one of the 3 forms of recycling. Unlike down-cycling and direct re-use, up cycling adds artistic, sentimental or monetary value to an item.
It’s important to up-cycle, as not only does it help to keep items out of landfill, it reduces the consumption of poorly made, mass produced items, with a shorter life span.
You can up cycle a wide range of household objects. In this article we take a closer look at furniture specifically, we’ve cherry picked some fantastic projects for you to try at home. Let’s get creating.

As a general rule some pine, and even flat pack, furniture is attractive painted. What is often referred to as ‘brown’ furniture, where the frame of the piece is made from a darker hardwood, such as oak, tends to be better stripped. Up cycling efforts being aimed at re-upholstery instead. There are no hard and fast rules though and some projects combine stripping and painting.
A chest of draws can look very attractive with painted draws and stripped frame. The paint can contrast with, and add brightness to, the patina of the wood. But it is completely down to personal taste.
Some older, weathered and chunkier pines can be extremely attractive stripped, and a trend in the past few years has been to strip, or leave bare table tops, whilst painting the legs, or parts only, for a rustic shabby chic look.
If you do decide to strip wood or leave it in its natural, unvarnished state, you may wish to wax or oil the wood afterwards. This will help to protect it, enhance the patina, and will prevent cracking.
Linseed oil and beeswax are good for inside use, teak oil for outside furniture. But there are a whole host of products available.
Don’t forget that if you do decide to paint or varnish, you might find left over tins in the back of the shed, at the local tip or recycling centre etc. Re-use is a part of the ethos wherever possible, and it can take you down exciting avenues when you stay true to that ethos. However, you will need a suitable paint for the material/effect, and you may have no option but to buy it.

This stylish breakfast/crafting table was created from an old garden gate that was about to be thrown away. It was simply sawn through the middle, sanded and linseed oiled, to create a stylish table top.
Once you start to up cycle, be open to what you might find. Garden gate tables have a lovely weathered look, but so too might old floorboards, sleepers etc.

Keep an eye out for something to create the legs with. As you can see from the under side, the advantage of using a garden gate, is that it provides an existing sturdy frame onto which to attach the legs. The legs have been made from the remaining part of an old piece of outdoor furniture. They have simply been fastened using screws and wood glue.
A number of items can make good legs. Old card tables where the felt has worn away are very commonly found cheaply at antique fairs and car boots, and can be used to create elegant, fold away tables.
For this project you will need a sander, or two or three grades of sand paper. Work towards the finest grade at the end, and select the grades according to the finish that you hope to achieve.
An electric drill would be an advantage, however a screwdriver will work. You will need screws, wood glue, and depending on the effect that you are going for, you may want to source flat head screws. However this project was achieved using new cross head screws from a hardware shop.
Once the top has been sanded and oiled, attach the legs using the screw driver and wood glue. Be sure to get the right length screws for the job.

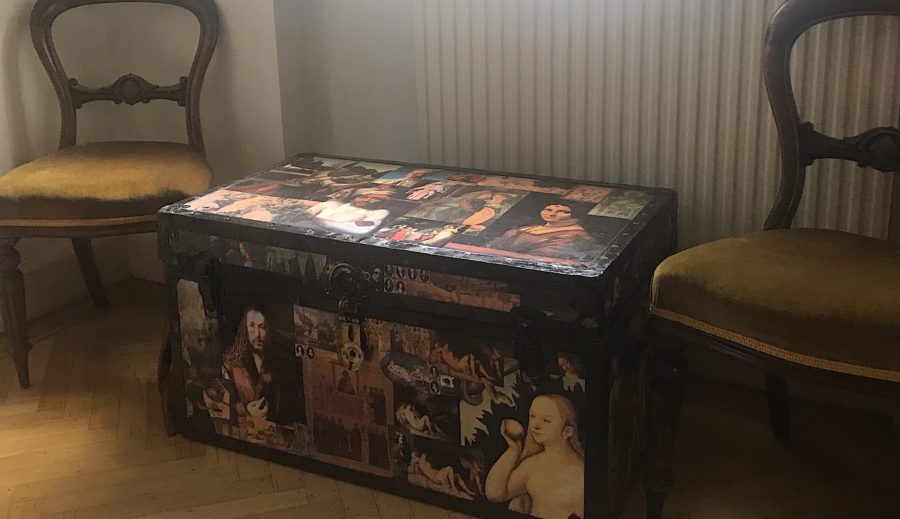
The word Découpage comes from the French to cut out’ and it is literally that: the art of decorating an object by gluing cut out paper onto it, and then usually varnishing, sometimes using paint/wash effects also.
It is a fun and creative way to give a new lease of life to anything from a tired old filing cabinet or trunk to a wardrobe or cupboard, sometimes saving it from becoming landfill.
Your project will depend upon the item that you have, and how the finished project will blend within your space. When selecting images, think about how the colours and subject matters will harmonise with your antiques, soft furnishings, and the space generally.
Use anything from old worn out books, comics, to maps, magazines, newspapers, illustrations, postcards and stamps. Découpage is a really nice way to display personal interests in your home. It is advisable to start keeping a folder for pieces that contextualise by theme, material or colour.
Découpage items also make for great personalised gifts. You could decorate an item with newspaper from the year of someones birth for example. You could use botanical illustrations from a charity shop, or images relating to society in the era that your antique furniture comes from.
Make sure that the item is clean/dust free and dry before glueing; and sand away any excess rust or protrusions.
Once the surface is ready, begin to cut out the paper and decide where you want it to go before glueing. Then glue piece by piece, ensuring that it is dry before moving to varnishing. You will probably require a few coats of varnish depending on the paper used, and on how hard wearing you intend the item to be. Varnish to taste, employing between four to 15 coats.

Re- upholstery, or creating entire new covers, as shown here, can really bring an old piece to life. Projects like these covers are great, but they require a sewing machine and a fair amount of experience.
This final project is an easy beginners one that anyone can do without a sewing machine. All you will need is:
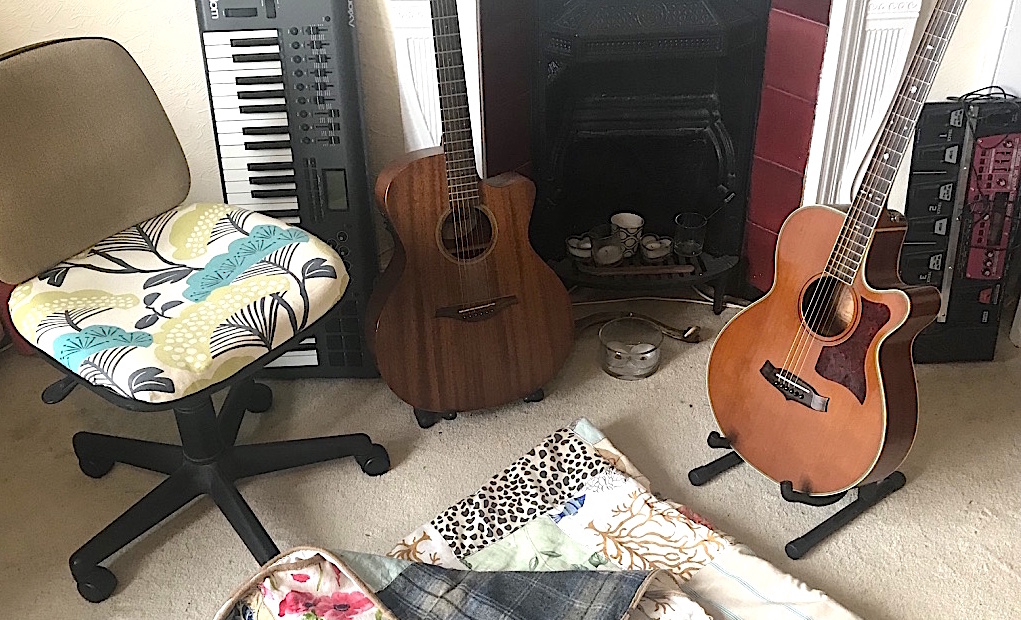
The fabric will need to be of sufficient weight to withstand day to day wear and tear, but need not be expensive. Old clothing and even tea towels can look great. As can tweeds, vintage fabric from charity shops, and so on.
This fabric came from Sanderson’s, and was the perfect thing for this music nook in an Arts and Crafts meets modern home.
Start by turning the chair upside down. Remove the screws (but keep them in order). Then carefully remove the seat. It may be glued, and you may need to tug a little.
Cover the seat all the way around with the fabric. There should be around 3 inches of excess fabric all of the way around.
Then cut the fabric to shape. Start to staple the fabric to the frame, creating folds at the corners. It can look a little messy on the underside, as long as the parts that will be seen look neat.
Once finished pop it back in, and re-screw the item together.
There are so many ways to bring up cycled items into your home to really set off your antique collection. Don’t be afraid to experiment with unusual combinations. But most of all, let your choices reflect your personality.
Happy up cycling.
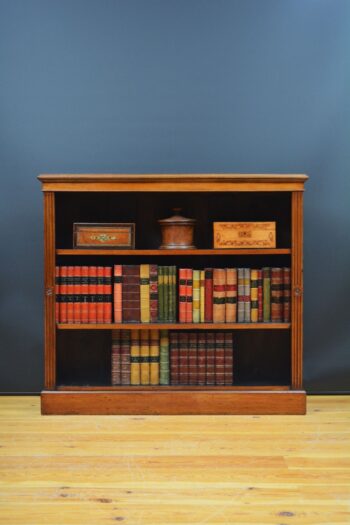 Edwards and Roberts English Victorian Open Bookcase in Walnut
Original price was: £1,250.00.£1,150.00Current price is: £1,150.00.
Edwards and Roberts English Victorian Open Bookcase in Walnut
Original price was: £1,250.00.£1,150.00Current price is: £1,150.00.
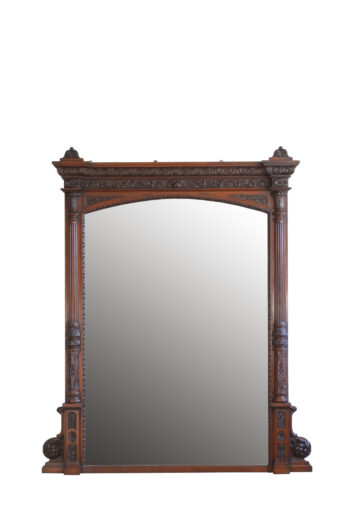 Monumental Oak Overmantle Mirror / Floor Standing Mirror H200m
Original price was: £3,600.00.£2,950.00Current price is: £2,950.00.
Monumental Oak Overmantle Mirror / Floor Standing Mirror H200m
Original price was: £3,600.00.£2,950.00Current price is: £2,950.00.
 19th Century Giltwood Wall Mirror
£1,685.00
19th Century Giltwood Wall Mirror
£1,685.00
 Late Victorian Solid Oak Open Bookcase
£985.00
Late Victorian Solid Oak Open Bookcase
£985.00
 Victorian Solid Oak Open Bookcase
Original price was: £1,450.00.£995.00Current price is: £995.00.
Victorian Solid Oak Open Bookcase
Original price was: £1,450.00.£995.00Current price is: £995.00.